Category Archives: Hustle Castle

Hustle Castle – Milking PvP for Resources

The PvP (player vs. player) battles in Hustle Castle are one of the best ways to acquire building resources: gold, wood, and iron. However, the difficulty of PvP battles are designed to scale based on how frequently you win. The more you win, the harder they get. This serves to somewhat limit the resources you can get from PvP battles.

It is possible to get lots of resources every day from PvP battles, though. This article will explain a step-by-step methodology that I use to get the most from PvP battles.

NOTE: The process outlined here might not seem to be working right away. It could take a few days before you start to see the benefit. Be patient. It really does work. Just this morning, I got over 5M gold in about 30 minutes.

Recommendations

To get the most out of this methodology, I recommend the following:

  • Premium – Yes, I know, this costs money, and many people don’t want to spend money on a game. I don’t get a kickback from the developers. Honest! A Premium account isn’t required, but it gives you five key elements that help significantly with this procedure:
    • Extra food – Your Food Court will produce 20% more food each hour when you are on Premium. The more food, the more you can do.
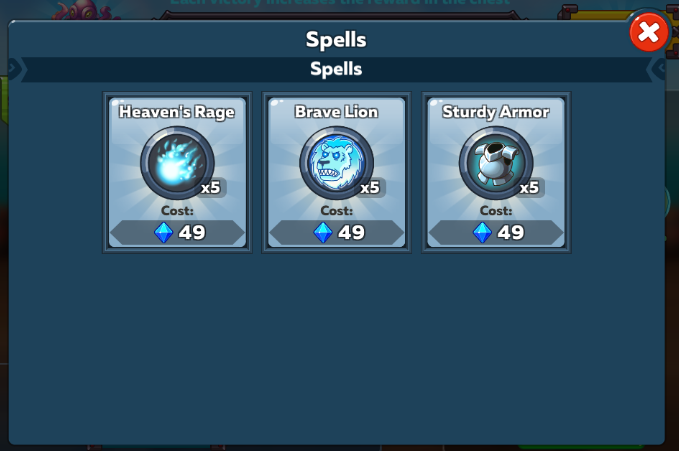
    • Extra spells – Spells help you to win PvP battles. When you run out of spells, you will avoid more difficult enemies, and might miss out on some very lucrative opportunities.
    • Extra winnings – Premium gives you an extra 10% of resources from each PvP battle you win. So, for example, if you win 100k gold, then you would actually get 110k with a Premium account.
    • Protected stores – Premium protects 30% of your resources from theft by other players. If you follow the process laid out here, you will find that you are losing very few resources to your enemies when you have a Premium account.
    • Barracks healing – When you have Premium, your fighters will heal while they’re still in the Barracks. You don’t need to deal with moving them into and out of the hospital.
  • Goblin Helper – This is even more crucial than Premium, and it’s free, as long as you budget your diamonds properly. The goblin helper is key to accumulating enough food to do the required number of PvP battles. He will collect food from your Food Court while you are not actively playing the game.

The process

I do my PvP activities in the morning, while I’m getting ready for work. The map gets filled with opponents several times per day, and one of those times happens overnight, while I am sleeping. Another refill happens at right around 7 AM (EST) and so sometimes I can get in an extra few battles from new opponents that appear at that time.

In order to maximize my morning PvP benefit, I take steps to prepare in the evening, right before I go to sleep. I want to have plenty of food, plenty of spells, and low ranking points each morning.

Ranking points: You want these to be low so that you get easy opponents.

Evening preparations

Gem Bay

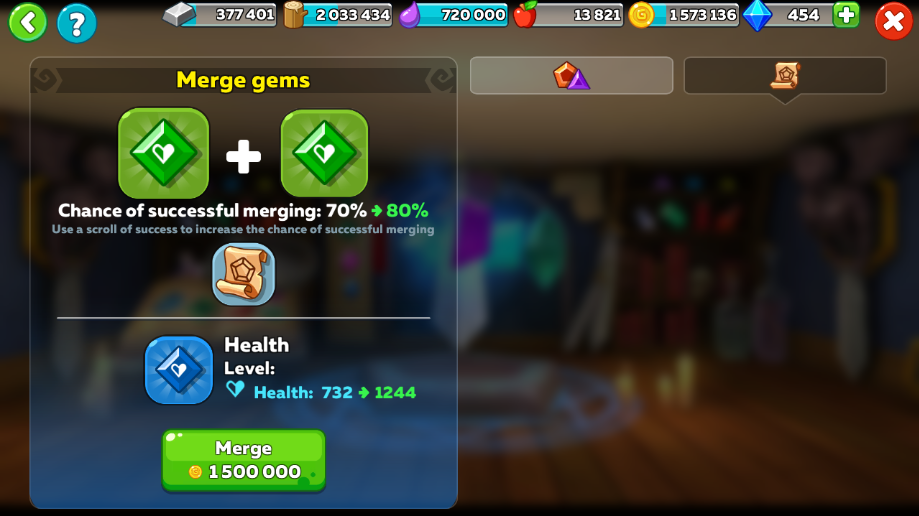
As one of the last things that you do before going to bed, take a journey in the Gem Bay, and bring a full complement of 12 spells with you. It’s a good idea to save one of your free trips for this purpose. You should make sure that you have as many spells as possible prepared before you go into Gem Bay. Ideally, you would pull all 12 Gem Bay spells from your inventory, and not from your equipped combat spells.

Pull spells for Gem Bay from Prepared spells, not Combat spells.

The reason for this is that you can craft a replacement spell for each spell that you pull from your inventory to bring into Gem Bay, but you can’t craft a replacement for the spells pulled from your Combat spells.

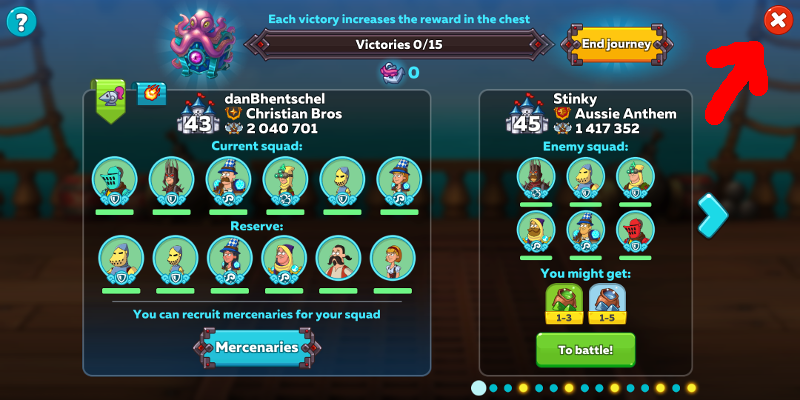
Once you enter Gem Bay, immediately exit again, using the red X in the top-right corner. Don’t worry. This won’t end your Gem Bay journey. You can come back again later to continue battling.

Click the red X to exit. Don’t click the End journey button.

When you have exited Gem Bay, go to your Magic Workshop and refill your spell crafting queue.  Now here’s where the magic happens. Go back to Gem Bay and finish out your journey. Once you are done, any unused spells will go back into your inventory, even though it’s already full!

Using this method, you can overfill your spell inventory. It’s not uncommon for me to have 20 – 23 spells in my inventory in the morning, even though I’m only supposed to be able to stock 18.

Magic Workshop

It’s not enough to just fill up your spell queue. You want to make sure that all those spells will be available to you in the morning. Make sure you fill your Magic Workshop with skilled workers (equipped with Speed-up chronometers and Watchmaker suits) so that the spell crafting will go more quickly.

Resources

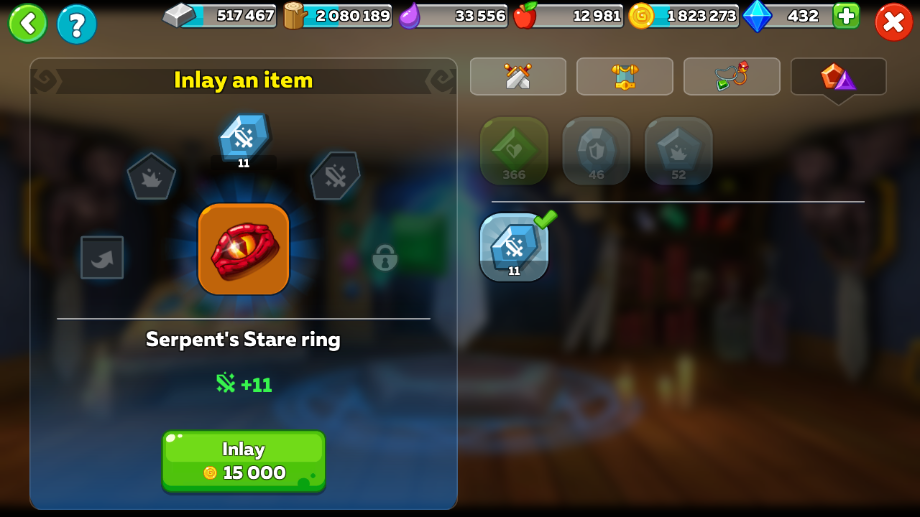
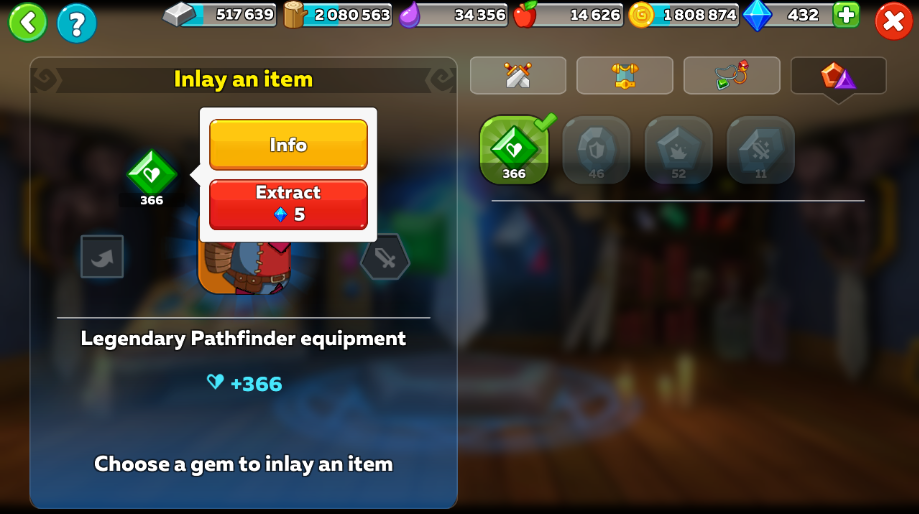
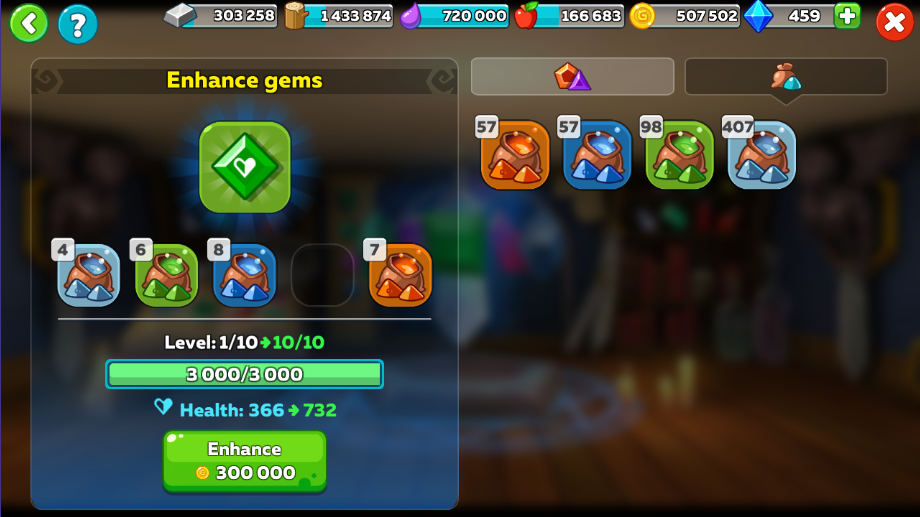
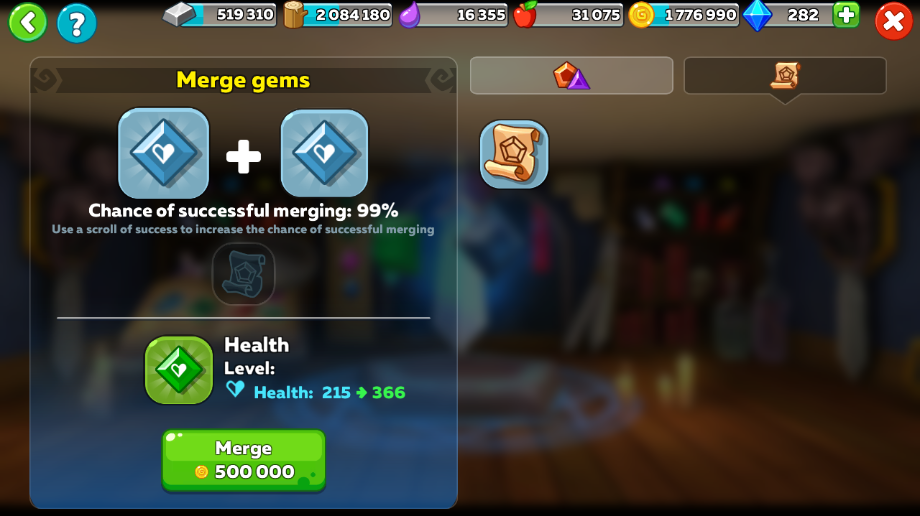
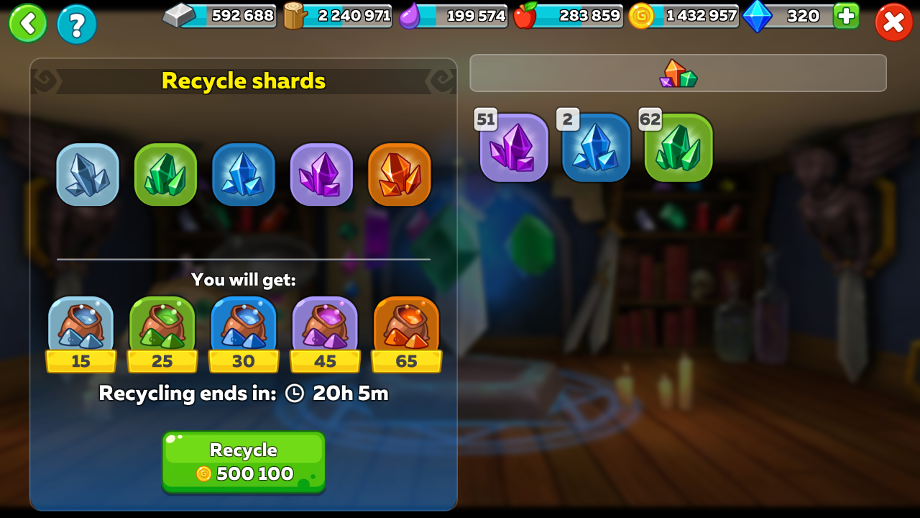
Spend any resources you don’t want to lose. Use gold to enhance gems. Use mana to craft items. Wood and iron aren’t so important. You can’t spend them as easily, but you’ll find that they’re usually full anyway if you follow this methodology.

Food sources

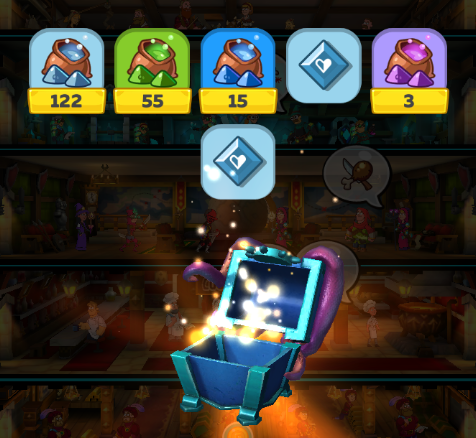
Don’t open your gifts from friends in the evening. Leave them for the morning. Also, don’t open your daily chest; leave that for the morning as well. You might want the extra food.

Barracks

Last thing… empty your Barracks if it isn’t already empty.

I mean completely empty. Don’t leave a single person in there. I know this sounds counter-intuitive. I know you will be attacked during the night. Trust me. That’s a good thing. We’re trying to decrease your ranking points. I’ll explain more later.

Morning routine

Groom your opponents

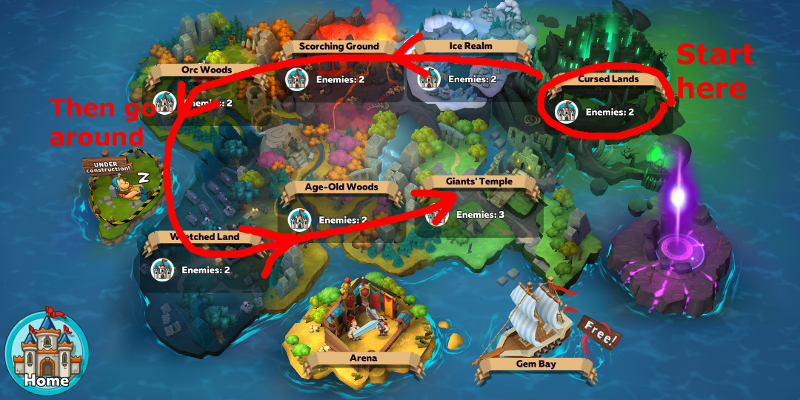
When you first start up Hustle Castle in the morning, don’t do anything until you first check out your opponents. Don’t watch any ads, don’t read your clan chat. Go immediately to the map.

In a systematic fashion (I start in the top-right and go counter-clockwise) check every single one of your opponents for suitability.

Move around the map in a systematic fashion.

You need to look at two things:

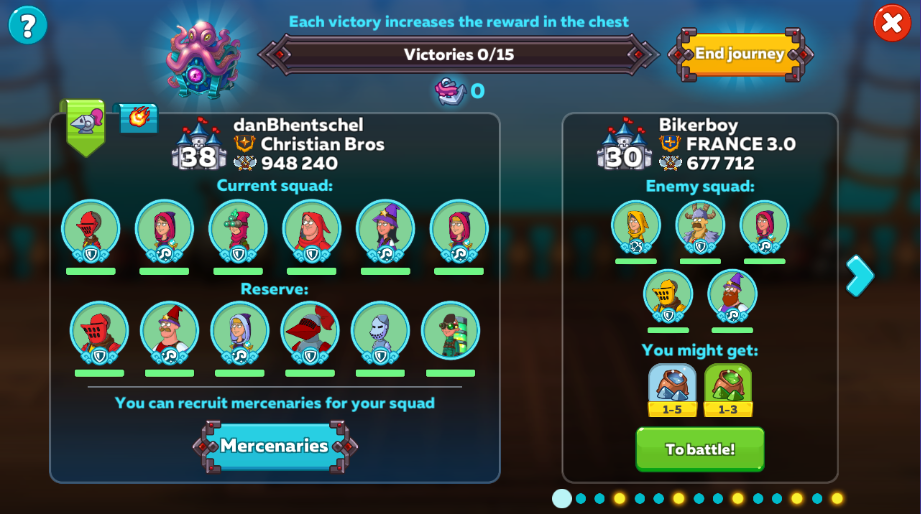
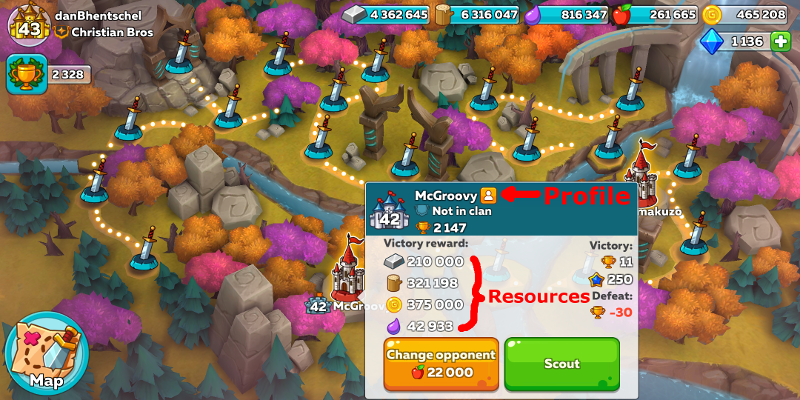
  • Resources – Have in mind a minimum amount of resources you are willing to accept. For me, this is 100k gold. If the enemy has less than the minimum resource requirement, then they are unsuitable.
  • Squad power – Have in mind a maximum squad power that you are willing to face. For me, this is 1.7M. If the enemy has more than the maximum acceptable squad power, then they are unsuitable.

For every single unsuitable opponent, click on the orange Change opponent button. This is very important: change out all unsuitable opponents first, before you start any battles! Your replacement opponents will be based on your ranking points, and those will increase as you defeat opponents.

TIP: You can quickly get an idea of an opponent’s squad power by clicking the small profile button to the right of their name. This is historical information, though. It doesn’t reflect the current squad power in their Barracks. To see that, you need to click the green Scout button. Scouting takes longer, so I tend to only use it if the squad power is close to my threshold.

Look at resources and squad power. Change opponent for any unsuitable matches.
Attack opponents

Once you have groomed your opponents, go through the map systematically, attacking every suitable castle. I make 3 passes through the map. Each time, I lower the bar for what opponents I am willing to attack. Here is my own personal criteria for each pass:

  • 1st pass – Only attack castles with 400k or more gold
  • 2nd pass – Attack castles with 200k or more gold
  • 3rd pass – Attack castles with 90k or more gold

You can set up your own criteria, and determine how many passes you want to do. You should always start with the most attractive targets first, to make sure that you can get to them before you run out of resources (or time.)

Healing between attacks

Depending on the strength of your next opponent, you may need to take some time to allow your fighters to heal. This is why I told you to start the process before doing anything else in the game. Here are some suggestions for things to do while waiting for your squad to heal:

  • Watch ads (ad chest, movie theater, fighter training room, etc.)
  • Read clan chat
  • Send gifts to friends
  • Receive gifts from friends (when you have room in your Food Court for the food)
  • Open your daily chest (when you have room in your Food Court for the food)
  • Open other chests
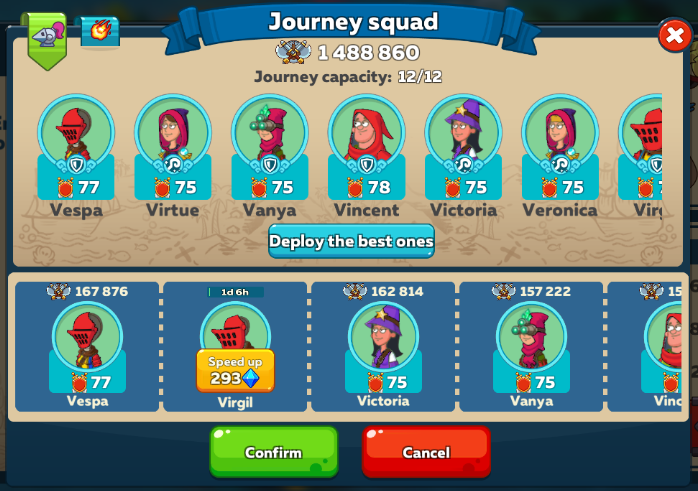
  • Send fighters to Gem Bay
  • Start a tournament
Finish attacking

Keep attacking opponents until one of the following happens:

  • Run out of food
  • Run out of spells
  • Run out of suitable opponents
  • Run out of time
Spend resources

Once you are done attacking, I recommend you spend your resources ASAP. Build something or enhance some gems. Otherwise, you could lose the resources if someone raids your castle.

Of course you can’t do this if you are trying to save up for something big. But if you are close to having enough resources, then you might want to open some chests, request resources from your clan, or even spend some diamonds just to ensure that you can get all that stuff out of your castle before exiting the game.

Get revenge

Now that you’re done, your ranking points have most likely shot up from all the battles you have won. Let’s push them back down again so you’re ready for tomorrow! To do this, we’re going to fight a bunch of revenge matches.

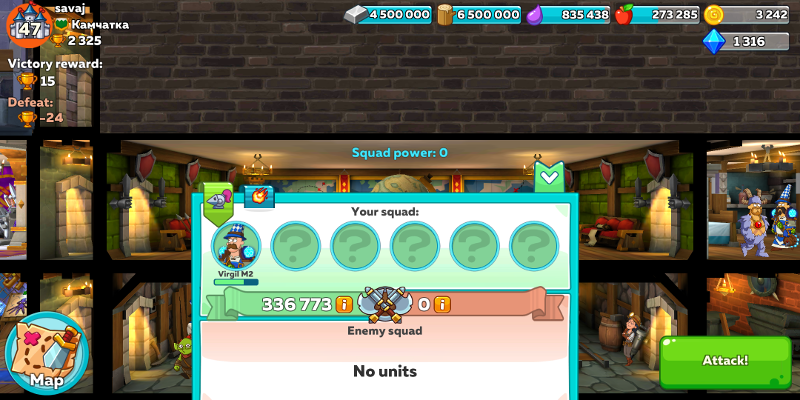
First, empty out your Barracks except for one fighter. You want to lose these battles! I usually leave a single mage. They die quickly. You need to have at least one person in the Barracks or you won’t be able to attack.

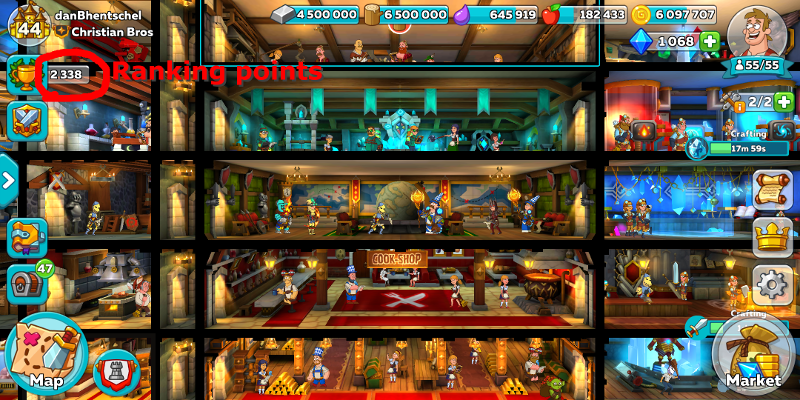
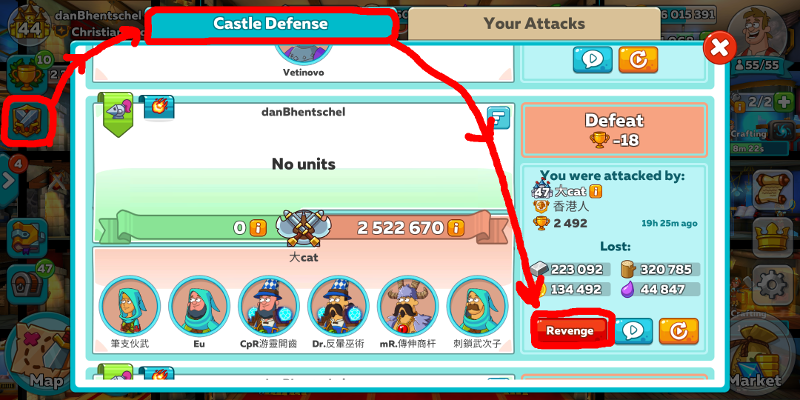
To get revenge, click the crossed swords icon near the top-left of your castle screen. Go to the Castle Defense tab, and scroll down until you see an opponent who has a red Revenge button available. Click this button, then click the green Attack! button on the next screen.

Click the crossed swords, then Castle Defense, then scroll down and click a Revenge button.

NOTE: You might occasionally run across someone with an empty Barracks. Don’t attack! You will win this battle, and the goal here is to lose!

Run away!

Keep doing revenge battles until either your ranking points get below your desired threshold, or until you run out of revenge opponents.

My own personal goal is to stay between 2300 and 2400 ranking points. If you go too low, then your opponents don’t have enough resources. If you go too high, then they are more difficult to beat.

Empty your Barracks

Don’t forget to get that last person out of your Barracks. Otherwise, some joker will attack you with a cook, or something like that, and lose to you, pushing your ranking points back up again.

Conclusion

Now you are finished with your day’s PvP activities. Depending on your motivation level, and amount of food you are willing to expend, you could try to do a couple of PvP cycles in the day, or maybe 1.5 cycles, with the second one only attacking very attractive opponents.

It’s up to you. You have the formula now. Feel free to tailor the process to your own needs.

Remember that it might take a few days for this process to bear fruit. Be patient. Once you get used to the thresholds that are good for you, and once you’ve been ranked low for a while, then you will start to see the benefits.

Details on ranking points

I have pushed off the detailed discussion of ranking points because it’s not important for the process, and would just clutter the instructions. Here is the information for people who want to know the reasons behind the procedure.

PvP matchmaking

In general, the game tries to pick you PvP opponents who have roughly the same number of ranking points that you have. If you are playing the game straight (not gaming the system like I’m describing here) then this means that you will always have challenging PvP opponents to fight against.

Whenever you win a match, you gain ranking points, and you will get more difficult enemies in the future. When you are defeated, you lose ranking points, and will be provided with easier enemies in the future.

Of course, if the entire game population followed the steps in this procedure, then it would stop working. Everyone would have artificially low ranking points, and you would be matched with difficult opponents even though your ranking points are low. On the plus side, the majority of Hustle Castle players will never see this article, and so this process will almost certainly continue to work well for the foreseeable future.

Grooming opponents

You should always change opponents when your ranking points are at an ideal value. This makes it much more likely that your new opponent will have a suitable squad power. If you wait until you have fought a few battles before you change opponents, then you will gain ranking points from winning those battles, and your new opponents will be more difficult.

Getting revenge

The only thing that you accomplish by getting revenge is to adjust your ranking points. You won’t get back the resources that were stolen from you. The only reason the revenge feature was added to the game was to give you an opportunity to regain your lost ranking points. Kinda pointless, huh? (pun intended)

But now we’re putting that stupid feature to good use. Clicking the Revenge button costs you nothing. No food cost. If (when) you lose, you don’t lose any resources. It just adjusts your ranking points, free of cost.

The number of ranking points you lose (or gain) is based on the difference between your ranking points and your opponent’s ranking points. If your opponent has very high ranking points compared to yours, then it is expected that you will lose, and so you won’t lose very many ranking points. From the game’s point of view, you lost to a much stronger enemy, and you’re probably already ranked appropriately. So it doesn’t adjust your ranking much.

On the other hand, if lose to an opponent who has very low ranking points compared to yours, then this indicates to the game that you are ranked much too high. You lost to an opponent that should have been weaker than you. In this situation, the game will apply a much larger ranking adjustment.

This is why I recommend that you do your revenge battles right after finishing all your PvP battles. Your ranking points will be somewhat high, and so you will lose more ranking points per revenge battle than you would if your ranking points were low.

Empty Barracks

Keep your Barracks empty as much as possible. If you have fighters in your Barracks, then people will start to lose to you. Other people are trying to drop ranking points too. Don’t let them use you to do it because that will push up your own ranking points.

You will lose resources. That’s okay. You can mitigate this by spending your resources when you get them, and by buying a Premium account. But don’t be afraid to lose resources. If you follow this practice, you will gain resources much more quickly than you lose them.

If you are saving up resources for something, you might want to keep your barracks full for a while until your can get the needed resources. Don’t do this for too long, though. It will break the cycle, and it might take a few days for the process to recover.

Hustle Castle – Artifacts

Artifacts in Hustle Castle can be a bit tricky. There aren’t that many different kinds of Artifacts, but there are many variables that can determine how effective they will be in your squad.

NOTE: Every artifact is helpful if used correctly. How much benefit you get from a given artifact will depend very much on the composition of your squad.

Artifacts can (currently ) only be acquired by purchasing from the Arena Store. They can be equipped onto any dweller, but they only benefit fighters.  Artifacts don’t directly add to either the attack or defensive power of your squad. Instead, they give unique benefits that complement your squad’s abilities, and might give you the slight edge needed to defeat your opponent(s).

Artifact attributes

Every Artifact has the following attributes.

Name and Icon

The Name and Icon of an Artifact are arbitrary. They have no bearing on what that Artifact does. You may have a Celestial Key that summons a healer, but your opponent may also have a Celestial Key that allows her fighter to teleport. Don’t get tricked.

Here are the current Artifact names:

  • Book of Prophecy
  • Celestial Key
  • Eternity Crystal
  • Lucky Horseshoe
  • Orb of Oblivion
  • Rune of Authority
  • Scroll of Insight
  • Shoulder Guard of Fortitude
  • Sprout of Anger
  • Vial of Life

Required fighter level

Just as with Weapons and Armor, Artifacts have a required fighter level to equip them. However, whereas the level on other equipment is a minimum requirement, Artifacts have a level range with both a minimum and a maximum. Your fighter can only equip an artifact if her level is within the specified range.

For some artifacts, the required fighter level affects how powerful the artifact is. An example of this is the Summon Sniper Artifact. Higher-level versions of Summon Sniper are, in general, more powerful than lower-level versions.

Here are the level ranges available for Artifacts:

  • 20 – 35
  • 35 – 45
  • 45 – 60
  • 60 – 75
  • 75 – 90
  • 90 – 100

NOTE: You can train your fighter beyond the maximum level of an Artifact that he has equipped. If this happens, then the Artifact stays equipped, but stops working. If you remove the artifact from the fighter, then you won’t be able to re-equip it.

This fighter has trained beyond the level range of his Artifact.

Rarity

While most fighter equipment comes in one of 5 Rarity levels (from Common to Legendary) Artifacts only come in one of 3 Rarity levels: Rare, Epic, or Legendary. There are no Common or Uncommon Artifacts.

For early Artifacts, up to level 45, only Rare is an option. Epic Artifacts are available starting at level 45, and Legendary is available starting at level 60.

Activation time

The activation time explains what battle conditions will trigger the Artifact to activate its effect(s). There are a variety of activation times:

  • Once in a while
  • When an enemy is resurrected **
  • Once in a while when an enemy is resurrected
  • When an ally is resurrected **
  • Once in a while when an ally is resurrected
  • When an enemy dies **
  • Once in a while when an enemy dies
  • When an ally dies **
  • Once in a while when an ally dies
  • Upon dying **
  • Once in a while after an enemy minion is summoned

** – Denotes activation times for Artifacts that will only activate once per battle.

TIP: Pay attention to the activation time of your Artifacts. It wouldn’t be helpful to equip an Artifact that activates “once in a while when an ally is resurrected” if you don’t have any resurrect wands in your squad.

TIP: In general, an artifact that specifies an activation time of “once in a while” will activate more frequently than any other artifacts. An activation time of “once in a while after an enemy minion is summoned” is generally the least useful.

Activation name

The activation name is a short description of the effect(s) of the Artifact, when activated. Here is a list of current activation names:

  • Abyssal Summoning
  • Backstab
  • Blood lust
  • Cleansing
  • Explosion Hazard
  • Spell Caster
  • Summon Healer
  • Summon Sniper
  • Time Distortion

Activation effect

The activation effect is a longer description of the effect(s) of the Artifact, when activated. The magnitude and duration of activation effects can vary based on the fighter level and / or based on the rarity of the artifact.

Here are the full-text descriptions for each activation name (with the variable parts in <> brackets):

Abyssal Summoning

Deals <magnitude> damage to and stuns all enemies for <duration> sec. Summons a minion next to the enemy (health <magnitude (range)>, damage <magnitude>). <Activates 1 time per battle.>

Backstab

Teleports behind enemy units for <duration> seconds.

Blood Lust

Casts the blood lust on a fighter, decreasing their health by <magnitude>% and increasing damage caused by <magnitude>%.

Cleansing

Removes all effects from a random fighter on the battlefield.

Explosion Hazard

Deals <magnitude> damage to and stuns all fighters on the battlefield for <duration> sec.

Spell Caster

The damage the fighter does is reduced by <magnitude>%, but their ability cooldown is reduced by <magnitude>%. Lasts for <duration> sec.

Summon Healer

Summons a minion with a healing ability to the battlefield. Heals <magnitude> per second. Lasts for <duration> sec.

Summon Sniper

Summons a ranged unit to the battlefield that attacks the most distant targets. Deals <magnitude> damage per second. Lasts for <duration> sec.

Time Distortion

Slows the next ability cooldown in all enemies by <magnitude>%. Speeds up the next ability cooldown in all allies by <magnitude>%.

Uniqueness

An Artifact can be labeled as Unique. If this label is present, then only one of that type of Artifact can be used by a given squad in a battle. If two copies of the same Unique artifact are equipped by the same squad, then only one of them will work. The other will be impotent.

There is only one aspect of a Unique Artifact that is used to determine if it is the same as another Unique Artifact: activation name. This is a confusing subject, and many players misunderstand it. Here are some examples that will hopefully clear things up a bit:

These are two different Artifacts. They can be used together

On first glance, these two artifacts look the same. They aren’t, though. The left artifact is a Summon Healer Artifact. The right one is a Time Distortion Artifact. Even though they are both marked as Unique, they can both be used together by the same squad in the same battle because they have different activation names.

These Artifacts are the same. They cannot be used together.

These two artifacts might look very different, but they both have the same activation name: Summon Healer. Since they are labeled as Unique, and they have the same activation name, only one of them can be used by the same squad in the same battle.

These Artifacts are the same, but they can be used together.

These two artifacts have the same activation name: Backstab. They are not labeled as Unique, though, and so they can both be used by the same squad in the same battle.

NOTE: If two or more of the same Unique Artifact are equipped by the same squad in the same battle, then whichever one happens to be activated first will be the one that is effective for the rest of the battle. For example if one artifact is activated “Once in a while when an enemy is resurrected” and the other is “Once in a while when an ally dies” then which one is effective depends on whether an enemy is resurrected first or an ally dies first.

Artifact details

NOTE: Some of the values below are described as being random. That means that you can occasionally find two copies of the same artifact, with the same rarity and fighter level, that have very different stats.

Abyssal Summoning

Abyssal Summoning does damage to all enemies, stuns all enemies, and summons a tank-like minion. It is first available to level 60 fighters, and can only be obtained in Epic and Legendary Rarities.

Abyssal Summoning is a Unique Artifact. It has the following variables:

Damage to all enemies

When activated, the Artifact immediately deals a certain amount of damage to all enemies.

The magnitude of this damage is somewhat random, but increases based on both rarity and fighter level.

Stun duration

When activated, the Artifact immediately stuns all enemies for a certain period of time.

The duration of the stun depends solely on the rarity of the artifact. For Epic Artifacts, it is always 0.5 seconds. For Legendary, it is always 0.8 seconds.

Minion health

The minion summoned by this artifact is semi-permanent. It doesn’t disappear after a certain duration. Instead, it has a specified amount of health, and only disappears after it has been killed by the enemy. It can’t be healed or resurrected. The health is specified as a range, and changes slightly, within this range, from one summoning to another.

The magnitude of this health is somewhat random, but increases based on both rarity and fighter level.

Minion damage

This is the amount of damage per second that the minion does to enemy fighters.

The magnitude of this damage is somewhat random, but increases based on both rarity and fighter level.

Activates 1 time

Abyssal Summoning comes in 2 flavors: single-use and multiple-use. If the Artifact specifies that it “activates 1 time per battle” then the numbers for damage to all enemies, minion health, and minion damage will all be significantly higher than if it can be used multiple times per battle.

Single-use and multiple-use Abyssal Summoning

Backstab

Backstab “teleports” the fighter that has the Artifact equipped. The fighter will always be teleported to the rear-most line of the enemy squad. If the enemy has any Archers, then your fighter will go there. If not, then she will attack the enemy’s mages.

NOTE: If your enemy also has a Backstab Artifact, and if your enemy’s fighter teleports first, then your fighter will teleport to attack your enemy’s teleported fighter.

When the effect expires, your fighter will return to where they were before the Artifact was activated. Your fighter will also return if he is killed. He will never be resurrected in his teleported location.

Backstab is first available to level 60 fighters, and can only be obtained in Epic and Legendary Rarities. It is not a Unique Artifact. It has the following variables:

Teleport duration

This is the length of time that the fighter is in his teleported location. There are only two possible values for this. For Epic Artifacts, it is 4 seconds. For Legendary artifacts, it is 6 seconds.

NOTE: Your fighter will pause briefly, for about 1 second, immediately after teleporting, so the effective attack durations of the two artifact variations are about 3 and 5 seconds.

TIP: Backstab works best with high DPS fighters because the fighter will only be teleported for short periods of time. The effect is most potent if you can kill at least one of your enemy’s mages while teleported. This can often be more effective when used in conjunction with Abyssal Summoning.

Blood Lust

Blood Lust decreases the health of one of your fighters by a certain percentage, making her much more susceptible to attack. But during this time, her DPS will be significantly increased by a certain percentage.

NOTE: The fighter’s health will always be reduced by a percentage of his health remaining at the time the Artifact activates. This means that your fighter will lose the most health when his health bar is full. If his health bar is almost empty, then he will lose very little health.

Blood Lust is first available to level 20 fighters, and can only be obtained as a Rare Artifact up to level 60. After level 60, it comes in only Epic and Legendary Rarities. It is not a Unique Artifact. It has the following variables:

Health decrease percentage

There are only two possible values for this, and it varies based on the Artifact’s Rarity. For Rare and Epic Artifacts, health is reduced by 75%. For Legendary Artifacts, health is only reduced by 65%.

Damage increase percentage

There are, again, only two possible values for this, and it varies based on the Artifact’s Rarity. For Rare and Epic Artifacts, DPS is increased by 90%. For Legendary Artifacts, DPS is increased by 125%.

TIP: Blood Lust works best on archers. Since they are in the back of the squad, they are less likely to be attacked, and they also tend to have high DPS to begin with, so you will get a pretty hefty boost from this Artifact.

Cleansing

Cleansing removes all effects from a random fighter on the battlefield every time it fires. It’s not completely clear what this means. Does it only affect enemies, or does it affect allies as well? Does it only remove affects that are detrimental to your squad?

If you take the activation effect text at its word, then it can affect any fighter, enemy or ally, and it removes all effects, whether beneficial or detrimental. For example, if one of your fighters is stunned (which is bad) and is under the effect of a Blood Lust artifact (which is good) then Cleansing would remove both the stunned and Blood Lust effects.

Because of this uncertainty, and the very random behavior of the Artifact, few players purchase it.

Cleansing is first available to level 60 fighters, and is always an Epic Artifact. It is not a Unique Artifact.

There is no variation to this one. All Cleansing Artifacts are the same, other than level requirements.

Explosion Hazard

Explosion Hazard effects all fighters alike, both enemies and allies. It damages all fighters, and it stuns all fighters. The damage can only be beneficial when your fighters have more health than your opponent’s fighters. The stun can help your mages to recharge their magic effect, but it also helps your opponent’s mages. So it’s only helpful when your cooldown time is shorter, or when you know that your mages’ magic effects are better than your opponent’s.

TIP: Because of the dubious benefit of Explosion Hazard, few players (intentionally) purchase it.

Explosion Hazard is first available to level 60 fighters, and can only be obtained in Epic and Legendary Rarities. It is a Unique Artifact. It has the following variables:

Damage to all enemies

When activated, the Artifact immediately deals a certain amount of damage to all enemies.

The magnitude of this damage is somewhat random, and probably increases based on fighter level. I’m not sure because I haven’t seen enough examples of Explosion Hazard to tell for sure.

Stun duration

When activated, the Artifact immediately stuns all enemies for a certain period of time.

The duration of the stun depends solely on the rarity of the artifact. For Epic Artifacts, it is always 1.5 seconds. For Legendary, it is always 2.5 seconds.

TIP: Explosion Hazard is not recommended for Arena tournaments, where you are scored based on speed. This Artifact is likely to slow you down.

Spell Caster

Spell Caster, as hinted in the name, is only useful for mages. It reduces the mage’s DPS in exchange for also reducing her spell cooldown time. This effect only applies to the mage who has equipped the Artifact.

NOTE: If the mage’s spell is a damage spell, the damage done is not reduced by Spell Caster.

Spell Caster is first available to level 60 fighters, and can only be obtained in Epic and Legendary Rarities. It is not a Unique Artifact. It has the following variables:

Cooldown reduction

There are only two possible values for this, and it varies based on the Artifact’s Rarity. For Epic Artifacts, cooldown time is reduced by 60%. For Legendary Artifacts, cooldown time reduced by 80%.

NOTE: The DPS reduction is always fixed at 90%, and the duration of the effect is always fixed at 5 seconds.

NOTE: It is unknown whether or not this Artifact can affect cooldown times other than those associated with mage wands. For example, there is a cooldown associated with skeleton armor. Is that cooldown reduced by this Artifact?

TIP: Spell Caster works very well with spells that can be cast in rapid succession, such as damage, healing, or stun spells. It is possible (especially with the 80% reduction Artifact) to cast multiple spells within the 5 second period that it is active. It may be less useful for resurrect or insta-kill spells, which are situational.

Summon Healer

Summons a mage-like minion to heal your squad. It is first available to level 20 fighters, and can only be obtained as a Rare Artifact up to level 60. After level 60, it comes in only Epic and Legendary Rarities. Summon Healer is a Unique Artifact. It has the following variables:

Health restored per second

The magnitude of health restored is somewhat random, but increases based on both rarity and fighter level. It also seems to be affected by the length of the minion’s lifetime. The longer the effect, the less health is restored each second.

Minion lifetime

This determines how long the minion will stay. There are two possible values: 6 seconds or 12 seconds. The lifetime of the minion seems to be random. It’s not based on the Artifact’s rarity or its required fighter level.

Summon Sniper

Summons an archer-like minion to attack your enemy. It is first available to level 20 fighters, and can only be obtained as a Rare Artifact up to level 60. After level 60, it comes in only Epic and Legendary Rarities. Summon Sniper is a Unique Artifact. It has the following variables:

Damage per second

The magnitude of damage dealt is somewhat random, but increases based on both rarity and fighter level. It also seems to be affected by the length of the minion’s lifetime. The longer the effect, the less damage is dealt each second.

Minion lifetime

This determines how long the minion will stay. There are two possible values: 6 seconds or 12 seconds. The lifetime of the minion seems to be random. It’s not based on the Artifact’s rarity or its required fighter level.

Time Distortion

This slows down ability cooldown in enemies while simultaneously speeding up cooldown in allies. At first glance, it may seem that this is just another version of the Spell Caster Artifact. There are several differences, though:

  • Time Distortion affects all fighters in the battle. Spell Caster only affects the fighter who has equipped the Artifact.
  • Spell Caster decreases a fighter’s DPS. Time Distortion has no undesirable side-effects.
  • Time Distortion affects a single cooldown cycle for each fighter. Spell Caster has a duration of 5 seconds, and can affect multiple cycles within that 5 second period.

Time Distortion is first available to level 60 fighters, and can only be obtained in Epic and Legendary Rarities. It is a Unique Artifact. It has the following variables:

Cooldown reduction / extension

There are only two possible values for this, and it varies based on the Artifact’s Rarity. For Epic Artifacts, both the reduction of allies’ cooldown time and the extension of enemies’ cooldown time is 30%. For Legendary Artifacts, both values are increased to 45%.

NOTE: There are a lot of details about the workings of Time Distortion that aren’t exactly clear:

  • As with Spell Caster, it is unclear whether this Artifact affects the cooldown times of equipment other than mage wands. For example, does it affect the cooldown time for skeleton armor?
  • Is the Time Distortion effect a percentage of total cooldown time or a percentage of remaining time? For example, suppose a resurrect mage has a cooldown time of 5 seconds, and 2 seconds of that time are remaining at the point that a legendary Time Distortion is activated. 45% of 5 seconds is 2.25, but 45% of 2 is 1.1. So will the mage’s ability fire instantly, or will it fire in 0.9 seconds?
  • How do Time Distortion and Spell Caster interact? Do the effects stack so that a fighter’s cooldown time could be reduced by 80% and then further reduced by another 45%? Or does one Artifact override the other?
  • What happens if both squads activate a Time Distortion Artifact? Do they cancel each other out, or does the first squad to activate have an advantage? For example, if you take a 5 second cooldown and reduce it by 45%, you get 2.75 seconds. If you then extend 2.75 seconds by 45%, you get 3.99 seconds. What happens if both Artifacts are triggered by the same event? In this case, neither one happens first.

Artifact recommendations

As mentioned several times already, what artifacts work best for you will depend heavily on your squad configuration and equipment. However, I will add some general suggestions based on my own experiences.

Most desirable artifacts

Here are the best artifacts to try to get, ordered from most desirable to least desirable.

  • Backstab (for an assassin)
  • Time Distortion
  • Abyssal Summoning
  • Spell Caster (for damage or healing mage)
  • Backstab (for archer or tank)
  • Blood Lust (for archer)
  • Summon Sniper
  • Summon Healer
  • Spell Caster (for resurrect mage)
  • Explosion Hazard
  • Cleansing

Best activation times

Here are the best activation times to look for, ordered from most desirable to least desirable.

  • Once in a while
  • Once in a while when an enemy dies
  • Once in a while when an ally dies
  • Once in a while when an ally is resurrected
  • Once in a while when an enemy is resurrected
  • Once in a while after an enemy minion is summoned

Equipping tips

  • Don’t equip two Unique artifacts with the same activation name
  • If an artifact is likely to fire frequently, then equip it to a fighter that doesn’t do much damage. That fighter will pause for about a second when activating the artifact, and won’t be doing any damage during that time.
  • Equip your most important artifacts to a fighter who is likely to stay alive for a while. Artifacts don’t activate when the fighter is dead.

Hustle Castle – All About Gems

This past week, a new feature was introduced with the 1.5.0 version of Hustle Castle: Gem Bay.

Gem Bay is a new venue for PvP battles that allow you to win a few new items that open up new gameplay features:

  • Gems – Used to enhance fighter equipment
  • Dust – Used to enhance gems
  • Scrolls – Used in combining gems

NOTE: Don’t confuse gems with diamonds. For a long time, the community has used those two words interchangeably. Diamonds are the game’s currency. They can be used to purchase just about anything that you want in the game. Gems are a new feature, just introduced.

Fighting in Gem Bay

Every day you can enter Gem Bay once for free. After your free journey has been used up, you will need to spend food to go on additional journeys.

I strongly recommend that you take full advantage of this allowance. The only potential drawback to entering the bay for free is that you could end up expending spells.

Take advantage of your free journeys

When you enter Gem Bay, you are prompted to select up to 12 fighters to bring with you on your journey, and up to 9 spells.

NOTE: If you have a Premium account, then you will get 2 free journeys per day, rather than one. You also can bring up to 12 spells on your journey with Premium, rather than the standard 9 spells.

Fighters

There is no disadvantage to bringing a full complement of 12 fighters on your journey with you. You will only use 6 at a time, and so the more options you have available to build this team of 6, the better you will perform.

Select fighters for your journey

You can pull fighters from any part of the castle. There is a handy “Deploy the best ones” button that you can click to select the 12 best fighters. The game seems to select the best based on the dweller’s fighting power. This is usually a good idea, and can save you some time, but be aware that it selects dwellers based on their current equipment, and so it might not necessarily select the highest-leveled fighters.

You will need to equip your fighters as desired before you click the Confirm button. Once you confirm your journey squad, you will not be able to adjust their equipment.

Spells

The introduction of Gem Bay makes spells much more important. Previously they were only useful in PvP, PvE, and Portal. But now you can bring up to 12 spells with you on your journey.  These spells can be selected from both your Combat Spells (equipped) and from your Prepared Spells (inventory).

Any spells that you don’t use will be returned to you once your journey is over.

Mercenaries

You can hire mercenaries during your journey to augment your squad. These mercenaries are very powerful fighters, but they are also expensive. There are 5 pairs of mercenaries, 2 tanks and 3 mages. The two fighters within each pair are similar to each other except that one is always stronger than the other. The weaker fighter always costs 99 diamonds to hire, and the stronger one always costs 199 diamonds.

Mercenaries can be purchased with diamonds
Tank
  • Stephen & Mortal Joe – lower damage per second, higher health
  • Hyde & Thunder – higher damage per second, lower health
Mage
  • Bo’Reese & Bertrand – Focus on strong attack with occasional small healing of allies.
  • Valerie & Harvey – Focus on healing allies. Harvey has significantly higher health than Bertrand, but lower Crit.
  • Mr. Sins & Heartless One – Focus on resurrection, with occasional stasis field to protect self. Heartless One also heals allies occasionally, and has significantly higher health than Bertrand and Harvey, but lower Crit and Dodge.

Gem Bay spells

There are also 3 special spells that can be purchased in Gem Bay. They are similar to Portal spells in that they are unique to Gem Bay, and they can only be used in that setting.

Spells can also be purchased with diamonds

These spells cost 49 diamonds for a 5 pack, and they augment your own crafted spells in the following ways:

  • Unlike your crafted spells, you can take as many Gem Bay spells as you want into each battle.
  • You can still carry 6 crafted spells into each battle, in addition to whatever number of Gem Bay spells you equip.
  • The Gem Bay spells have a separate cool-down cycle from your crafted spells, which means you can cast spells more rapidly when you utilize both types.

Here are the spells available for purchase in Gem Bay:

  • Heaven’s Rage – Deals 12000 damage to all enemies hit by the explosion
  • Brave Lion – Increases ally damage by 175% for 4 seconds
  • Sturdy Armor – Increases ally physical armor by 35% for 7 seconds

Gem Bay battles

During your Gem Bay journey, you fight a sequence of 15 battles of (generally) increasing difficulty. Each battle is against another player’s squad, but unlike in the Arena, the battles do not require your opponent to be interactively playing the game.

TIP: You can even exit Gem Bay during your journey by clicking the red X in the top-right corner. If you do so, then you can come back at any time later to continue where you left off.

Your journey consists of a sequence of 15 battles

Notice in the image above that the battles are shown by a sequence of blue and yellow dots. The color of the dots indicates the rewards that you can get from winning the battle. Battles on a blue dot will only provide Dust rewards. Yellow dot battles will provide Dust, Gems, and Scrolls.

NOTE: The rewards shown for each battle are just potential rewards. They are not guaranteed. Winning the battle doesn’t guarantee that you will get everything shown.

For each battle, you can select up to 6 fighters (out of the 12 brought into Gem Bay) to form your squad. You can also select up to 6 spells. You will be given the opportunity to both hire Mercenaries and buy Spells in between each battle.

If any of your fighters is dead at the conclusion of a battle, regardless of win or loss, then that fighter can’t be used again in any subsequent battles. Whatever health your fighters have left at the end of a successful battle will be carried over to the start of the next battle.

On the other hand, if you lose a battle, then your opponent’s fighters will start the next battle with whatever health they had left at the end of the previous one.

Squad building tips

  • You might want to use your weaker fighters early on in the easier battles so that your stronger fighters are fresh when things get tough.
  • Make sure your squad is strong enough. If you get wiped out on one of the early levels, then you will lose 6 of your 12 fighters. This can seriously limit how far your journey will go.
  • Beware of relying on resurrect mages. If you win a battle while one of your fighters is dead, then you will lose that fighter for the rest of the journey. It can be a bit random and frustrating.
  • Have plenty of strong tanks available in reserve. They tend to be the most likely to be dead at the end of a battle.
  • Don’t pad your squad with weak dwellers such as cooks or treasurers. They will die quickly, and your mages will waste precious resurrect and heal spells on them.

Ending your journey

You can end your journey at any time, although I usually will fight until every dweller has been eliminated. It doesn’t hurt to try!

When you decide to end your journey, you will be presented with your potential winnings. Remember that you are not guaranteed anything that you see. It’s just potential at this point. For example, look at this haul from one of my journeys:

Journey loot? … Don’t count on it!

Wow! Up to 2 gray Gems, a green Gem, a common Scroll, and an uncommon Scroll! Sounds good, right? Let’s see what I actually got:

The actual reward

What happened to the green Gem and the Scrolls? They never manifested.

The Gem Workshop

The Gem Workshop is where you will do all your Gem-related operations. You will need to build the room, but it doesn’t require much in the way of resources, and it builds very quickly. You won’t ever need to upgrade it.

Effects on the gameplay

The Gem Workshop changes overall gameplay in the following ways:

  • Gold is much more important because every operation requires Gold; sometimes lots of it. Be prepared to do PvP battles to fund your Gem work.
  • It provides another use for Shards. You can recycle them into Dust. Even orange Shards can be used for this! No more holding on to your legendary equipment forever…
  • It’s another place for your scientists to work. Recycling Shards into Dust takes time, and can be sped up by adding scientists to the room.
  • It somewhat requires you to spend small amounts of diamonds. The only way to remove a Shard from a piece of equipment is to spend diamonds.

Inlaying Gems

The process of placing a Gem into a piece of equipment is called Inlaying. Each piece of rare, epic, or legendary equipment of a sufficiently high level (above level 55 or so) has Sockets in them, according to the following tables:

Number of sockets
RarityNumber of sockets
Common0
Uncommon0
Rare1
Epic2 - 3
Legendary4 - 5
Types of sockets
Equipment typeHealthDamageMagic damageArmorMagic armorSpell powerDodgeCrit
Melee weaponsXXX
Magic weaponsXXXX
Tank armorXXXXXX
Archer armorXXXX
Mage armorXXXXX
RingXXXX
AmuletXXXX

Gems can be inlaid into a socket if the type of Gem (Health, Armor, Crit, etc.) matches the type of socket.

Gems can be inlaid into matching sockets in equipment

After the Gem has been inlaid into a socket, it will enhance the associated stat of that piece of equipment. For example, a Crit Gem will add to the Crit value of the item.

You can see the effect of the enhancement when looking at your fighter’s equipment:

A weapon with two Gems

These daggers have a gray Crit Gem and a green Damage Gem. You can see the benefit of each at the bottom of the description: 48 Damage and 52 Crit.

Extracting Gems

Once a Gem has been inlaid into a piece of equipment, it can only be removed by extracting it. The extraction process costs diamonds according to the following table:

Cost to extract a gem
Gem colorNumber of diamonds
Gray1
Green5
Blue10
Purple??
Orange??

You extract a Gem by “Using” a piece of equipment on the Inlay screen. You then click the Gem that you want to extract, and select Extract from the menu.

Extract a gem on the Inlay screen

NOTE: You can’t break apart a piece of equipment until you extract all the Gems from it. If you try to break apart something that has an inlaid Gem, then you will be prompted to extract the Gem first.

Prompt when breaking apart

Enhancing Gems

Gems have levels. The higher the Gem’s level, the more powerful it is. Gems increase in level by enhancing them with XP. The number of levels, and the amount of XP required to level up depends on the color of the Gem:

Levels and XP required for each Gem color
Gem colorNumber of levelsXP required to level up
Gray5375
Green103000
Blue207500
Purple????
Orange????

So, for example, to enhance a green Gem from level 1 to level 3, you would need to apply 6000 XP, since each level requires 3000 XP. The XP to level up Gems comes from Dust. The different Dust colors provide different amounts of XP, according to this table:

XP for each dust color
Dust colorXP per unit of dust
Gray1
Green6
Blue70
Purple550
Orange4200
Enhancing a Gem

Notice in the above picture that the gem is being enhanced 10 levels. This costs 30000 XP. If you add up all the dust values from the image, you get 7 x 42000 + 8 x 70 + 6 x 6 + 4 = 30000. So this operation is calculated out perfectly to spend exactly the correct amount of XP.

Enhancement tips

  • The game will let you overspend XP. For example, the green Gem above could have been leveled up by spending 8 orange dust. That’s 33600 XP. Try to keep a supply of dust of different colors so that you can use the correct amounts to get exactly the right XP.
  • A gem’s level is not maxed out until you fill up its XP bar again after it reaches the highest level. So, for example, a gray gem will go to level 2 if you spend 375 XP. It will go to level 3 if you spend 750 XP, level 4 for 1125, and level 5 for 1500 XP. However, you will need to spend an additional 375 XP (for a total of 1875) in order to max out the Gem. It won’t push you to level 6, and you won’t get any additional benefit from the Gem, but it is required before you can use the Gem in a merge.
  • You do not need to spend XP all at once. You can enhance a Gem a level or two by spending some XP on it, then use the Gem for a while, then later go spend more XP on the Gem to enhance it some more.
  • You can enhance a Gem that is already inlaid into the socket of a piece of equipment. It’s not necessary to extract the Gem first.

Merging Gems

You can create Gems of more powerful colors by merging two Gems together.

Merging two gray Gems

In order to merge two Gems, the following must be true:

  • Both Gems must be the same color. For example, you can merge a gray with gray, but you cannot merge a gray with green.
  • Both Gems must be the same type. For example, you can merge a Health with Health, but you cannot merge a Health with Crit.
  • Both Gems must be maxed out on XP. They must be at the highest possible level for that color of Gem, and the XP bar must be full.
  • At least one of the Gems must not be inlaid in a piece of equipment. It’s okay for only one Gem to be inlaid.

TIP: If you merge an inlaid Gem with a non-inlaid Gem, then the resulting Gem will be inlaid in that piece of equipment.

Merging two Gems together to form a new Gem can possibly fail. The more powerful the color of Gem you are creating, the more likely it is that the procedure will fail. The following table shows the likelihood that a merge operation will succeed:

Costs and success rates associated with merging Gems
Gem color being createdMerge cost (gold)Likelihood of success
Green50000099%
Blue150000070%
Purple250000050%
Orange????
Merging two green Gems to create a blue Gem

You can use a Scroll to increase the likelihood of a successful merge. In the image above, you can see a common Scroll being applied to the merge operation to increase the likelihood of success from 70% to 80%. Only a single scroll can be applied, and after the merge is done, the scroll is used up, regardless of whether or not the merge was a success.

If the merge is successful, you will have a single Gem of a different color, and it will be on level 1, with no XP. If the merge fails, then you are left with the original 2 Gems. Both of them will lose some random amount of XP, and may lose several levels. They will need to be leveled up to the maximum again before the merge can be reattempted.

Recycling Shards

You can recycle Shards to turn them into Dust. This procedure is relatively straight-forward. You just pick the Shards that you want to recycle, and then start the operation.

Recycling a single shard of each color

As can be seen above, you can select shards of different colors and process them all at the same time. The more shards you choose, the more Gold you will need to spend, and the longer the process will take.

Not all Shards produce the same amount of Dust. This table shows how much Dust, and consequently how much XP, each Shard color produces:

Quantities of Dust and XP from different Shard colors
Shard colorAmount of dustAmount of XP
Gray1515
Green2590
Blue302100
Purple4524750
Orange65273000

Also, the different Shard colors take different amounts of time to recycle. The rarer the Shard, the longer it takes. If you recycle multiple Shards of the same color, the amount of time per Shard decreases. So, for example, to recycle a single green Shard takes 30 minutes, but to recycle 33 green shards doesn’t take 16.5 hours. It only takes 13.5 hours. This table shows the amount of time to recycle a single Shard of each color:

Time to recycle a Shard
Shard colorTime to recycle one shard
Gray5 min
Green30 min
Blue1 hr 30 min
Purple6 hr
Orange12 hr

TIP: Notice in the image above that it takes 20 hr 5 min to recycle one of each shard. If you add the numbers for a single shard of each color together, you’ll see that it adds up to 20 hr 5 min. There is no time savings for recycling shards of different colors at the same time.